INSTALLING NEW CARPETS

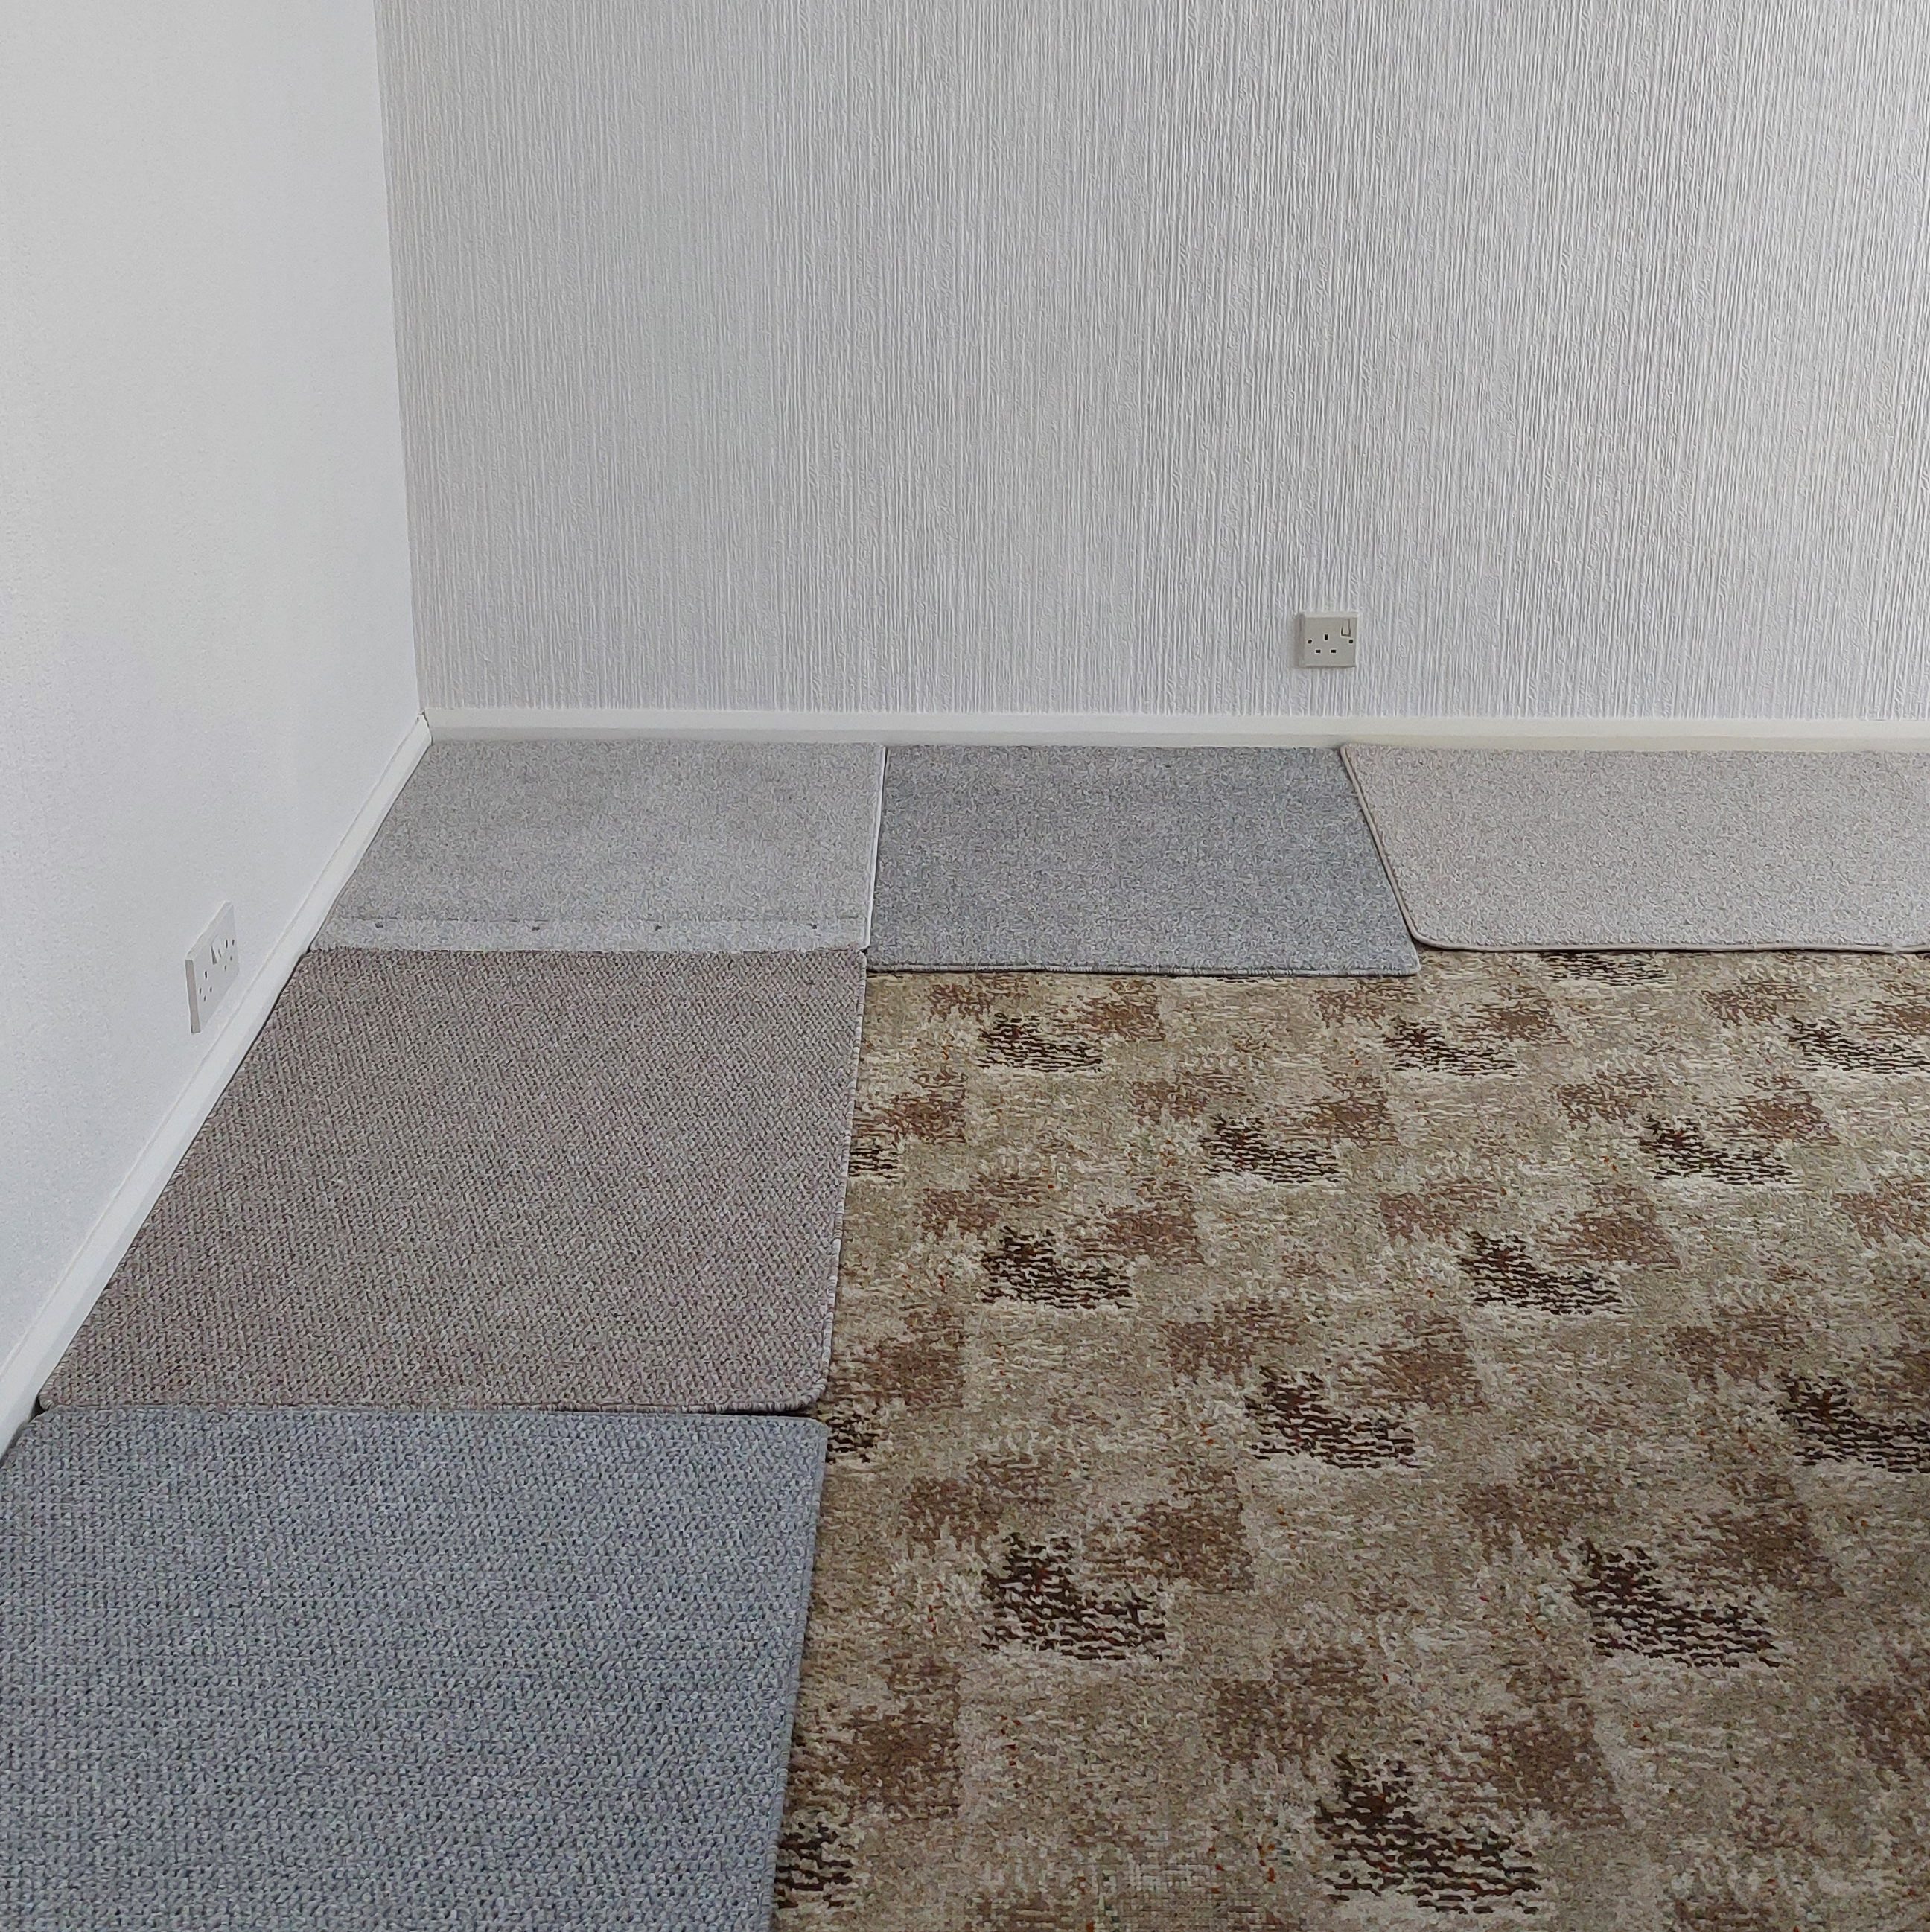
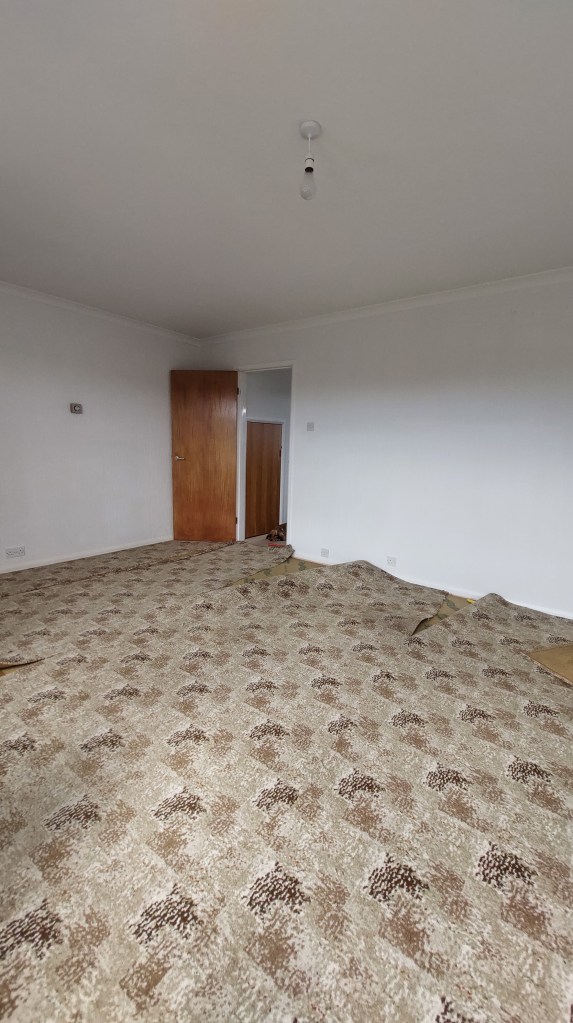
We hadn’t planned on updating the carpets straight away and were going to make do with the rather funky green carpet in the living room. However once we got the keys to the empty property we realised just how manky the bedroom carpets really were and decided to replace some of most of carpets straight away. We went to the local Franks Carpets round the corner from us and picked up a few samples. There wasn’t too much choice in line with our 0 budget and we ended up choosing 2 different styles, one for the living room and a different one for the bedrooms.

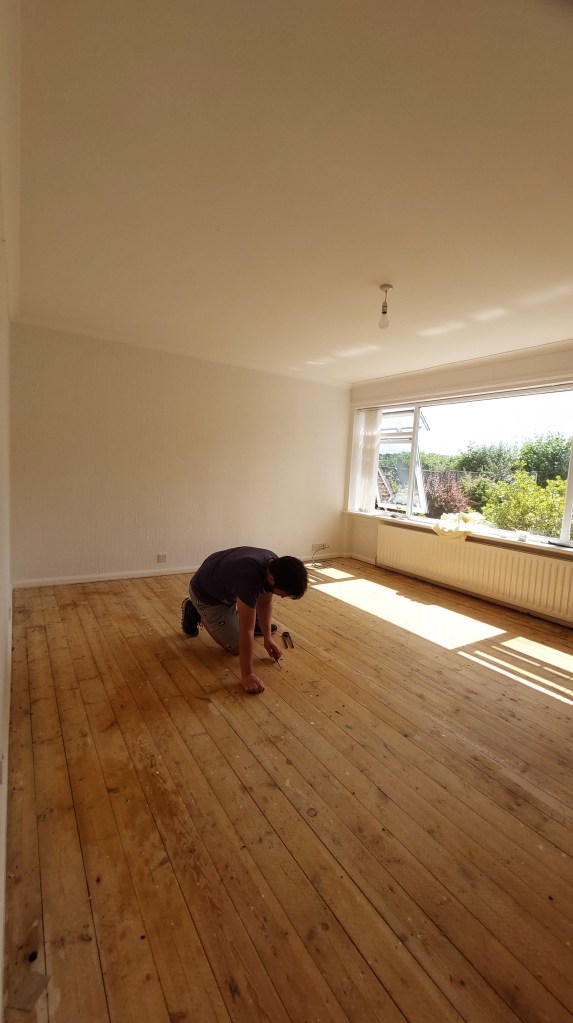
To save money we got rid of the old carpet ourselves, but due to time restraints we left the installation of the new carpets to the professionals.

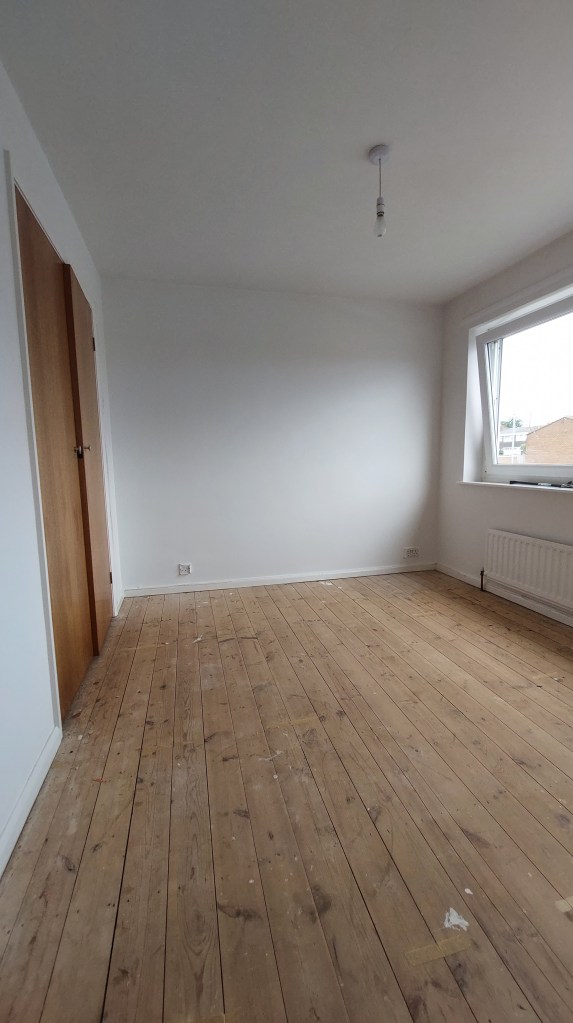
Having removed the carpets and falling in love with the look of the wooden floor boards, we were a little sad that we did not have the time or finances at that point in time to restore the floor / put new wooden floors down. I suppose that’s a dream that can still be fulfilled in the future and for now the new carpets were a much needed and welcome improvement.

We had a good week overlap between getting our keys to the new house and having to hand back the keys to our old rental. Although it was nice to not have to move in 1 day and feel like we had a bit more time, it still ended up being an extremely stressful week especially when we decided we needed the carpets replacing and ideally before we moved all the furniture in.

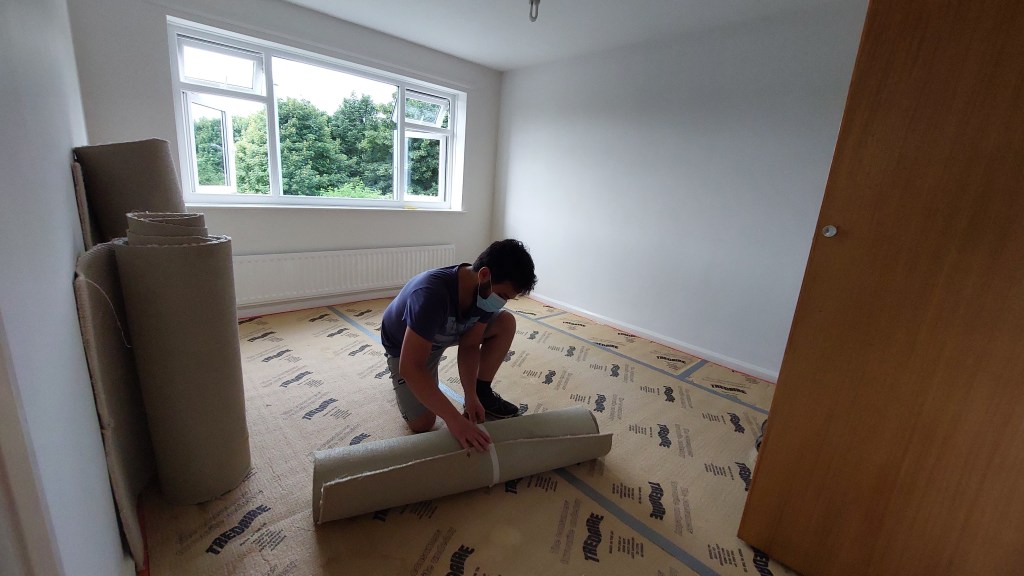
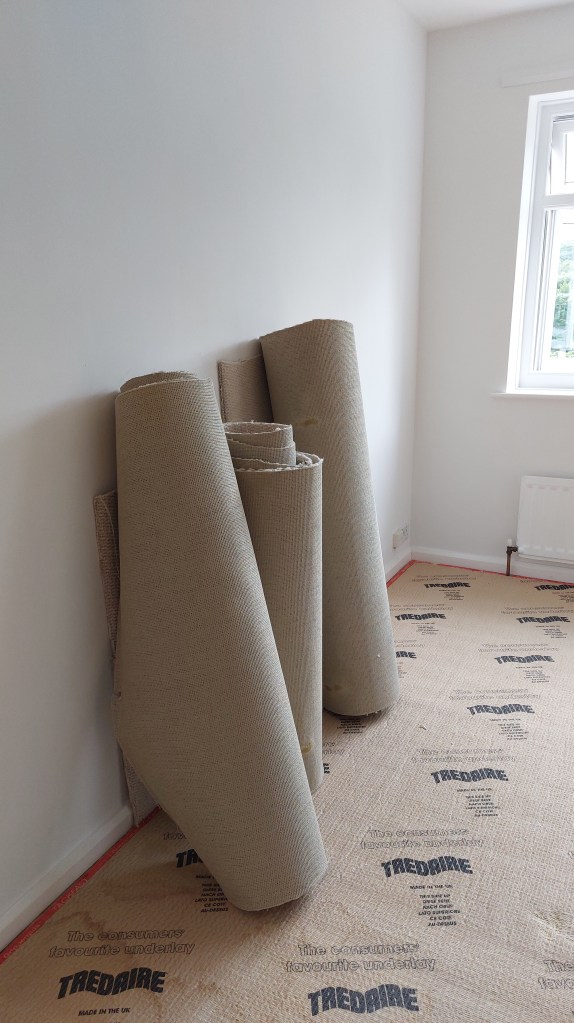
But we ended up being really lucky, as Franks Carpets managed to squeeze us into their schedule on the Thursday, the day before we’d hired a van to move all the large furniture across. This was great as it meant the house was still pretty much empty allowing for a quick and easy carpet installation.

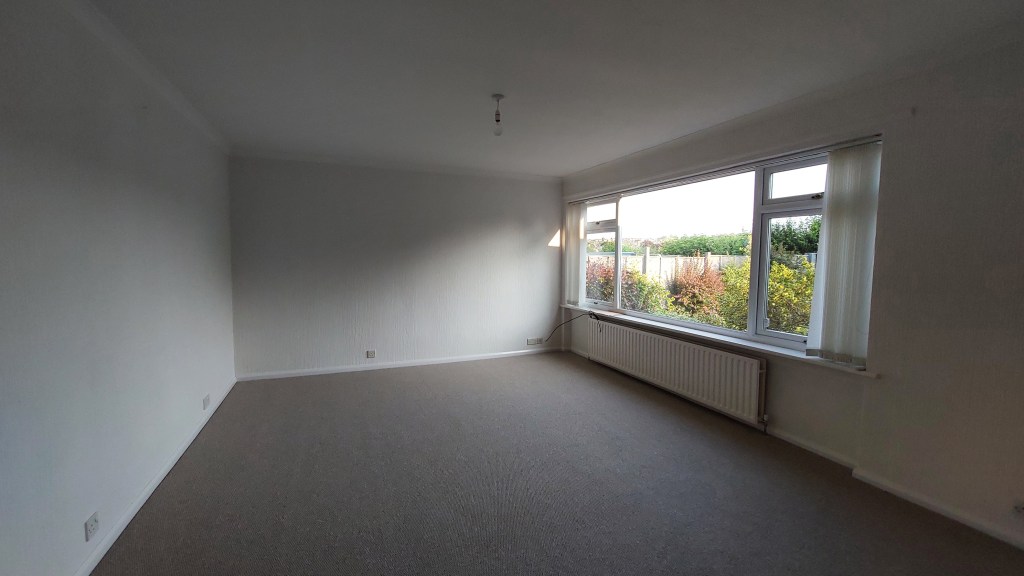
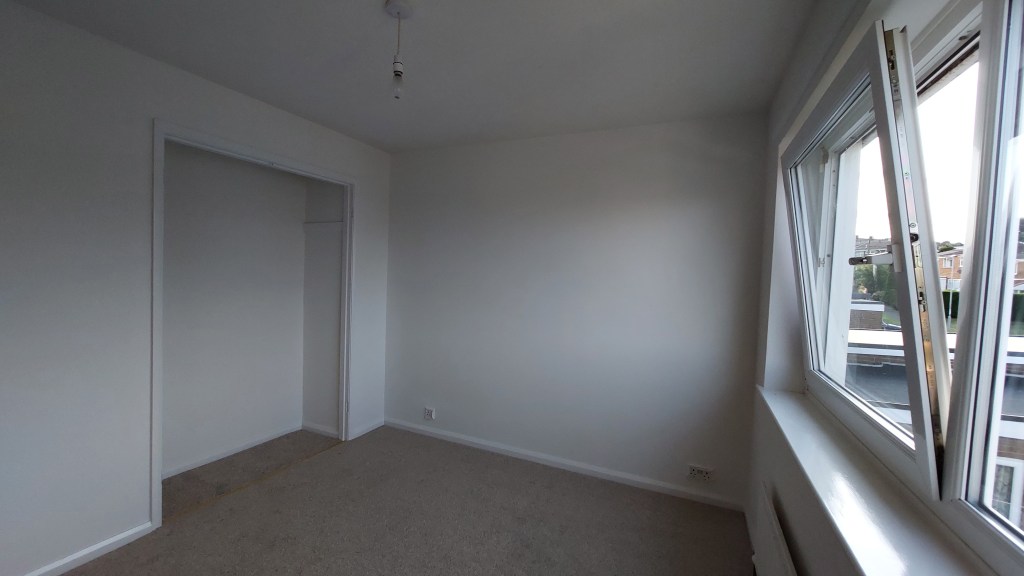
Here’s the after shots – such an improvement.

Living / Dining Room
Master Bedroom
Office / Art Studio

VEGAN MERINGUES

Good evening beautiful souls,

If you follow me on Instagram (@simplycarinaxo) you will already know that I made vegan meringues the other day!!

If you’re a meringue fan but are like myself a vegan and can’t eat eggs or are allergic to eggs or even just fancy trying something new, then this recipe is for you.

I’ll warn you in advance, although easy it takes almost 3hs to make these meringues, but they are super tasty and so it’s totally worth it!

Now you might be wondering how on earth you can make vegan meringues when one of the main ingredients is egg white. Well I’d heard ages ago that chickpea brine could apparently be used as an egg white replacement and so when I stumbled across this recipe I was eager to test it.

I was a bit skeptic at first but apart from turning out somewhat hollow and crisp rather than chewy, they were very tasty!!

If you’re not drooling already at the thought of a meringue dessert then here’s the recipe for you to test yourself :

Makes 6-8 meringues

  • 400 g can of chickpeas which should yield
  • 100g of aquafaba (brine)
  • 110g of caster sugar
  • Vanilla seeds

Whisk the aquafaba at high speed until stiff white peaks are formed; this will take about 15-20 minutes.

Mix the vanilla seeds into the sugar before adding the mixture to the aquafaba a couple of spoonfuls at a time, making sure the sugar is whisked in properly before adding the next few spoonfuls.

When all the sugar is mixed in and the meringue is thick and glossy, it is ready.

Preheat the oven at 130 degrees centigrade and line two baking trays with grease proof paper.

Spoon the mixture (I’d say a large heaped tbsp) onto the baking tray well apart as the will grow quite a bit.

Now bake for 1 3/4 – 2 hours until the meringues are fairly firm unto and on the base. Take out of oven and leave to cool completely.

Once cool, you can enjoy this delicious treat however you like. I suggest some vegan vanilla ice cream and a fruit compote or fresh berries!

Now enjoy!

If you give these a go do let me know how they turn out!!

BEETROOT BROWNIES

Good evening beautiful souls,

It’s time for me to share one of my favourite recipes with you – I hope you are excited!!!

This recipe is from the beautiful vegan cookbook Peace & Parsnips. I love this book and everything I have tried so far has been super tasty, so I can’t wait to try more recipes in the future!

I’ve made this beetroot brownie recipe a couple of times now; the brownies are super easy to make, perfectly moist and of course taste amazing! So no excuse not to try this recipe for yourselves!

I have altered the original recipe a little, but it is quite flexible so don’t worry about experimenting. Anyway, let’s jump right into it!

Ingredients:

  • 300g dark chocolate
  • 150ml vegetable oil
  • 125g Flour
  • 100g Prunes
  • 100g Nuts
  • 200g Silken tofu
  • 125g Beetroot, finely grated
  • 150g Unrefined brown sugar

(I also added some dried apricots and a little rosewater – although apparently not enough of the latter as I couldn’t taste the rose flavour – I need to experiment more with this I future)

Method:

Firstly, melt the dark chocolate carefully in the microwave on a low heat/defrost setting making sure you don’t burn it. Once melted stir in oil. Leave to cool.

Preheat oven to 190 degree.

Whisk tofu and sugar together in a bowl before stirring in the cooled down molten chocolate. Next add the beetroot, Prunes, and nuts (as well as apricots or whatever else you want to add) then slowly fold in the flour until all is combined.

Pour the mixture into a ca. 27×17 cm tin lined with banking paper and level out.

Pop in oven and bake for 25-30 minutes on the middle shelf.

Leave to cool in tray then lift out onto wire wrack and cut into squares. The brownies should be nice and moist with a slight crust on the outer edges.

Best served warm with vegan vanilla ice cream or fruit compote.

And there you have it! Brew yourself a nice cup of coffee, sit down, pick up your favourite book and enjoy this yummy treat!!

Please let me know if you try these as I’d love to see what you think!

MY FAVOURITE FACE CREAM

Good evening beautiful souls,

For Christmas a friend of mine gifted me with one of her beautiful handmade face & body creams. As I still had plenty of face creams open at the time I didn’t use it immediately. I was excited though because it smelt divine!

Now I know this review won’t be of much use to you as it is not a cream you can buy, however I’m so in love with it that I had to share!

It’s a thick cream but softens quickly through the warmth of my skin making the application nice and easy. At first I thought it would take forever to sink into my skin as it seemed somewhat oily once applied, however to my delight I was mistaken. It soaks up quickly and leaves my skin glow and smooth. What I also love is that it still feels like my skin can breath unlike some thick creams which feel like they leave a layer on my face. Best of all because it’s homemade there’s no nasties or preservatives in it, just natural goodness!

So as you can see my beautiful readers I’m in love with this cream and hope my friend will keep making it for me once this little tub of gold has run out!

Has anyone else tried any homemade creams??

Love Carina xo

VEGAN WRAP PIZZA

Good morning guys,

Yesterday I decided I would try making a pizza with wraps. I have seen so many people doing this and thought it was about time I tried it. I was plesantly surprised! It was yummy!

I started by putting a very thin layer of tomato pasta sauce on a wrap and then putting a second wrap on top. I thought a slightly thicker base would be nicer and the little tomato sauce stuck the two wraps together. Then I topped the second wrap with more tomato sauce, shallots, cherry tomatoes, vegan feta, salt, pepper, dried basil, parsley and oregano and cooked in the oven for about 10 mins till cheese had melted and the wrap looked crispy. Finally I topped it with fresh basil and a drizzle of balsamic. It really was rather tasty and I shall definitely be making this again! Its so quick and easy!! And filling!!

Have you ever tried wrap pizzas?? What are your favourite toppings, I’d love to know!

Love Carina xo